overidon.com Central Database for Overidon Omnimedia

June 14, 2011

Hearty Potato Cheese Soup Recipe

Filed under: Cooking — Tyler @ 3:10 pm
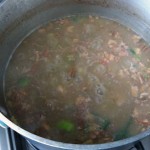
potato cheese soup

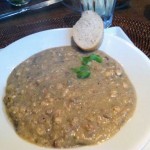
I know it looks like dog food - but it is very tasty

Although this is a recipe for potato cheese soup. It is more of a set of paintbrushes for one to fill his or her own canvas. For this recipe talks little of measurement, and much of listening and observation. This potato cheese soup took three hours to prepare and it was cooked in three separate stages. It is complex, and the quality of the ingredients (especially the potatoes and cheeses) will greatly determine the flavor of the dish. That being said, I prepared this meal for my family, which is four people. And in spite of how I prepared a tremendous amount of food, the entire vat of soup was completely eaten with zero leftovers. This was an achievement because none of us had ever eaten a dish like this before. Because quite frankly, this cheese soup had never been concocted before.

The three stages for this Potato Cheese Soup are as follows: First there is the stage of preparing the potatoes, vegetables, water base and seasonings. Second, there is the stage of preparing the second set of potatoes, the milk base, cheese, salts, sugar and the removal of large cheese lumps. Third, there is the final stage of combining the first and second stages into one large vat, and making modifications and boiling it down over the period of an hour or so.

The beauty of this soup is that the main ingredients are things that we often find laying around the refrigerator and pantry. These items are often neglected by bachelors and families alike, and so they will make great additions to your personal masterpiece.

First of all, you will need to realize that you will probably make too much food for you to eat in one sitting. So if you notice that is going to be the case, I recommend that you call a friend or family member and invite them over. This is because since there is a lot of dairy in this soup, I don’t think it would be that great of an idea to freeze and eat later. Refrigeration may be an option but sharing is always a better one.

You’ll notice that I’m not going to bother with an ingredient list, this is because this is more of a “kitchen sink” type of soup…that and precise measurements will actually work against you on this one.

potato preparation

Potato Preparation

To start, let’s cut up some potatoes. In the picture you will see we have two different types of potatoes. I had some sweet ones and some normal ones. The sweeter ones have the yellow color. These potatoes are going to get liquified and become part of the base of the soup. But we will have more potatoes later in Stage 2 that will be used for texture. The important thing about this step is to make sure that all the potatoes are peeled and cut into semi-small pieces. We don’t want any skin on them and also wash them so they are very clean. Boil them until they are soft. Once they get soft enough, take them out of the water and clean your boiling pot. You can let them hang out on a plate somewhere until you are ready to complete Stage 1.

The next step in Stage one is to boil broccoli and onions. They are going to be the main part of the Stage 1 along with the potatoes. Also, it is important to check around your refrigerator to see if you have anything else that you would like to add to the soup. One thing that I did was to chop up a lot of different types of nuts and add them to the boiling water. Even though I didn’t want to keep the nuts in for the final product, they would add a tremendous amount of flavor and good vibes to the hearty soup if they were allowed to boil long enough. I’d steer clear of spinach, that might not be the best texture for a dish like this. Cut the onions and broccoli into whatever sized shapes that you want for the texture of the soup. Remember, the onions will eventually liquify so there’s no pressure on that one. You’ll need to boil the broccoli and onions for a very long time. And once they are extremely soft take the potatoes from their plate and mix them with the broccoli and onions in the water.

In preparation for Stage 2 you should check your miscellaneous things that you want to add to your soup. In my case I had some corn and here is where I actually added some bach choi. I had some lonely bach choi in the fridge and that made a nice addition. I used some green onion as well. Make sure the corn is already cooked and the bach choi should be as well. If it isn’t the soup will taste strange.

Potato Cheese Soup

Potato Cheese Soup - Stage 1 with nuts added

This next part of stage one will seem quite odd-looking because the nuts add a brown color to the soup. It was unappetizing to the eyes although it smelled quite good. The key here is to keep boiling the water for a long time for it to seriously liquify the stuff. The broccoli at this point should be unrecognizable and the onions should have disappeared completely. You will notice that the nuts are floating to the top of the liquid. Once the nuts have been in there for about 40 minutes, take them out with a spoon that has small holes in it. It shouldn’t be that hard to get them out. If you have extra time on your hands. You can actually save those boiled nuts in a small bowl and turn them into something else. But I didn’t have time to do it, so we’ll have to save that recipe for a future day. Once the nuts are gone turn the heat on the vat to simmer and let it boil down while you work on stage 2.

The reason why you had to clean out the pot for cooking the potatoes in Stage 1 when you were done with it, is because you are going to use that pot again to boil even more potatoes this time. But these ones are going to be larger pieces to add texture and visual appeal to your soup. In the meantime, you are still simmering your Stage 1 vat.

secondary items for Stage 2

secondary items for Stage 2

To continue with Stage 2 you need to only boil the potatoes until they are just cooked…not soft. Then clean the pot out again or make your assistant do that. Then begin work on the daily base for the soup. You will need a lot of milk and butter and a few pinches of brown sugar for the base of the soup. I used a bit of oil in order to prevent burning and to show me when the pot was hot enough. So first add some butter to the pot and then when it bubbles add the milk. Stir it all around and let it bubble but don’t let it reduce down too far yet. Once the milk is boiling and taste it and double check that it is not too sweet. If it is too sweet add more milk and boil it down more.

Next add the cheese to the pot. The amount of cheese is dependent on your preferences. Remember, that the cheese should be white cheeses like fresh Parmesan or Swiss or even provolone would work. Don’t use yellow or blue cheeses, that would just be gross. The fun and also frustrating part about the cheese addition is that you are just wanting to extract the cheese flavour from the cheeses. The actually fatty-sticky parts of the cheese will need to be extracted in a similar way that the nuts were extracted in Stage 1. Some of the cheese fat stuff will be allowed to stay in the pot but I’d remove about 70% of the really sticky cheese fat. But the trick is that we are going to wait to extract the cheese fat until Stage 3. So let it get all monstrous in there for a while.

At this point if you haven’t been standing over the hot stove for an hour and 15 minutes or more, then you’ve been skipping steps. Your feet are probably tired by now and you are getting hungry yourself. If you have a helper, that’s a plus side. But if you are cooking this alone, it may seem daunting by now, and family members may be getting anxious to eat. The aromas of the milk, potatoes and cheese are filling the house and everyone is wondering what you’re doing. This is your magikal soup. They will appreciate it when its done.

Now is the fun part. Add all the secondary items that you found in your fridge that you want to add to Stage 2. This includes the corn that I had and the green onions and bach choi. Add it all to the milk and cheese base of Stage 2 and boil it for some time. After twenty minutes or so, check the consistency and flavor. If it is too sweet, add more milk and boil it down more. If it is too cheesy…that’s OK, this is a potato cheese soup remember? If you get super concerned, you can remove the large chunks of cheese fat early. Keep stirring this and let it reduce down until you get a nice semi-creamy consistency.

Now is Stage 3. The soup in the vat in Stage 1 should have been reduced and now is more like a strange potato and vegetable paste. This is a good thing and that will make the overall soup hearty. If your Stage 1 isn’t thick yet, that is OK, it just means that you will need to reduce everything even longer during Stage 3 but it is no big deal.

Go ahead and take your milk based items in your Stage 2 pot and dump it into your large Stage 1 vat. And go and clean out all the Stage 2 items when you get a chance. This should be very strange because you will have this dark browning paste mixing with some yellowish milk base and you are wondering why you ever started cooking this abomination of soup. The Zen books I’ve been reading would probably applaud you for this, saying that you have been properly, “Arousing the doubt sensation.” Regardless, the decisions you make in Stage 3 will determine whether your dish becomes a disaster…or delicacy.

Increase the heat on the vat to boiling again, and stir the combination of the Stage 1 with the Stage 2 items so they become as homogenous as possible. Let it all bubble and boil after a few minutes at medium-high heat. Double check the consistency of the soup, is it too watery? Is it too thick? Right now it should be on the watery side, unless you made your Stage  2 extremely creamy. If it is watery, keep boiling and reducing it down, and in the meantime begin removing the large chunks of cheese fat. You will notice that the cheese fat will take good food with them as you remove them and dispose of it. (DO NOT FEED YOUR PETS OR FAMILY THE EXTRACTED REDUCED CHEESE FAT – this is heart-attack city stuff here) Do not feel upset if your corn or bach choi or even potatoes get pulled out along with the cheese fat. This is completely normal. Also, by removing the cheese fat, you will be able to boil and reduce the soup even faster, as well as make it easier to taste test the flavour.

While you boil the Stage 3, have fun tasting it along the way. If it is too sweet, add milk and butter. Then boil it more to reduce the think. I also added pepper and some salt during Stage 3 as well. This was done to taste. But remember that the cheese has basically butter-ish fat inside it so you shouldn’t need to overdo it with butter unless you added way too much brown sugar earlier.

Once the soup if reduced to a semi-chunky and hearty dish. Serve it to yourself, your friends and family. You can look at the first picture at the top of this article in order to see what the finished product should slightly resemble.

Enjoy!

-Tyler
*SHARE*

December 31, 2010

Macadamia Nut Crusted Halibut

Filed under: Cooking — Tyler @ 2:37 pm
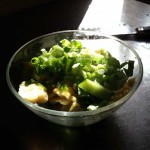
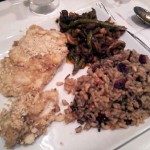
Halibut on Table

Macadamia Nut Crusted Halibut on table

This recipe is for Macadamia Nut Crusted Halibut. It will serve about 2 people. We made this on Christmas Eve and even though the halibut is pictured with side dishes, this recipe will only cover the halibut. Once prepared, the dish will be tender, crunchy, mildly sweet and moist. This dish takes a significant amount of time to prepare, but it can be done easily alone. But if you share this Macadamia Nut Crusted Halibut with someone, he or she will probably like you more than the day before. A dish like this is expensive, because you are purchasing high-quality ingredients and fresh fish. But once you make it, you will feel like you just ate something from a fine dining restaurant. The key is to purchase high-quality, fresh halibut. So make sure it was not frozen. The fish should look good when you buy it, and it should be the proper thickness of an inch or so. If it is some kind of huge steak, that won’t work for this recipe. Also if the fish is too thin, it will too “bready” tasting. Here’s what you will need in terms of cookware:

1 x large saucepan: for preparing the sauce

1 x wok style pan: for simmering the fish in the sauce

1 x sturdy wooden cutting board: for smashing up the macadamia nuts and other miscellaneous tasks

1 x large sturdy dish: for breading the halibut

1 x casserole dish: for cooking the breaded halibut

…the usual assortment of knives, large forks, spatulas and other tools…

Once you double check that you have all those items it is time to get out your shopping list for ingredients. For the breading you will need:

1 x bag of macadamia nuts (an $8 bag is what we bought, but you might be able to find one for cheaper. It is good to keep them in the bag so that crushing them is easier and less messy. In the end you will be able to pour out the crushed nuts with ease)

1 x bag of salted oyster crackers

1 x handfull of flour

3 x pinches of salt

2 x egg whites

The key is to prepare the breading first. That way you will be able to focus on making the sauce. Since crushing the macadamia nuts is the trickiest thing to do, you should get that out of the way first. First crush the nuts while they are still in the bag. That way you don’t have to worry about them spilling all over the place. If you ended up getting the macadamia nuts in a jar then use your imagination and crush them up so they are small enough to stick to the fish, but are big enough to provide texture and flavor.

After you crush the macadamia nuts and but them in the wide and deep plate or bowl, start crushing the oyster crackers. Once the oyster crackers are pretty small mix them up with the macadamia nuts. If you want to have a less expensive dish you can always “cut” the breading by using more oyster crackers and less nuts. Then you should add some flour to the mix. Now you are are ready to prepare the halibut and sauce.

For the halibut and its sauce you will need the following items:

1.5 to 2 x lbs of halibut (FRESH … UNFROZEN) Cut into two pieces

1 x olive oil

1 x whole milk

1 x half – stick of salted butter

2 x cups of brown sugar

1 x quarter cup of sweet onions (cut into long pieces)

6 x dates (pitted and broken apart, UNSWEETENED)

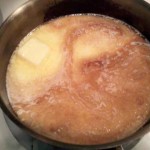
butter brown sugar and milk

butter brown sugar and milk

First take the large saucepan and put olive oil in it all around. And then heat the saucepan up really hot. Then put the half stick of butter in it. And let it sit there for about 5 seconds. Before it starts to get too burnt add a significant amount of milk and the brown sugar. The color should look similar to the picture on the right. Stir it up on medium heat. Add a few crushed macadamia nuts. (optional step) Then take the sweet onion slices and stir them in. The onion slices taste delicious with it if you just add a few. Then mix in a little bit of the egg whites. It should be about one-third of the total egg whites. Keep stirring and adjust the heat accordingly. Meanwhile you should have already washed and cut your fish. Your fish should be on some kind of plate waiting to be cooked. AT THIS TIME YOU SHOULD PRE-HEAT YOUR OVEN TO 350 degrees!

Now here is the fun part. Stir in the dates. This is going to make your sauce so yummy and gourmet. If you have a little flour left over add that also, but not too much…just a pinch. Keep stirring and taste it occasionally to see if it is ready to use with the fish. Remember you are going to cook the fish in this sauce first, then you will bake the fish. So this sauce should be slightly sweet to medium sweet. If it is too sweet this fish will be overwhelming.

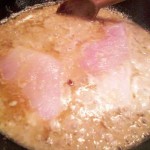
halibut cooking in pan

halibut cooking in pan

Once the sauce is to the desired taste, put in on medium heat and prepare your wok-style-pan with olive oil. Heat up the pan so it is HOT and then pour in the sauce. The sauce should be bubbling and very hot. Then put the fish in the wok pan and let it be partially submerged. It should look like the picture on the left while cooking the first side.Wait until the color of the fish changes. The bottom should turn to white and the top should be pinkish as pictured. That is when you should flip the fish. Then cook the fish and cover it with the sauce gently. If you stir too aggressively, the fish will break. After a few more minutes turn off the heat and remove the first fish piece from the wok. The fish shouldn’t cook in the wok more than twelve to fifteen minutes.

Take the piece of halibut using a spatula and gently bread it with the macadamia nut breading that you made earlier. After the first layer of crust is on the fish, gently add some egg whites to the halibut and then add some more breading. Then carefully place the breaded halibut piece in the casserole dish.

Finished Macadamia Crusted Halibut

Finished Macadamia Crusted Halibut - with other side dishes

Repeat this process for the other piece of halibut. Then put the casserole dish in the oven which was preheated to 350 degrees. It should bake for about fifteen minutes. (give or take a few, depending on how long you cooked it in the wok) After it is done cooking the halibut should be nicely crusted. In the picture to the right we added some side dishes. So experiment and think of things that would go well with this. This is a dish best served warm to hot. But it should taste very tender. If you did it right the sweetness of the sauce should permeate every bite and the halibut should have actually expanded in size. As you may note in the picture there is a smaller piece that is breaded. That is because part of the halibut broke off when I was stirring it. So I breaded that piece separately. It is OK because the smaller pieces are like candy crunchy bits. But it is preferable to keep your fish piece in tact, if possible.

-Tyler

December 21, 2010

Teriyaki Sesame Chicken Salad recipe

Filed under: Cooking — Tyler @ 10:05 pm
Teriyaki Sesame Chicken Salad complete

Teriyaki Sesame Chicken Salad (complete)

This recipe is for making Teriyaki Sesame Chicken Salad basically from scratch. The only things that you will use that is going to be pre-made will be the base liquids for the glaze and the salad dressing. But the rest will be done completely by you and you will probably have a tremendous amount of fun making this dish. Similarly to the other recipes in this section, the Teriyaki Sesame Chicken Salad takes about 1 hour for you to purchase the ingredients and 2 – 3 hours to make dish depending on how well acquainted you are with the dish. When my girlfriend and I made this dish Sunday she focused primarily on preparing the salad part and I concentrated on cooking and glazing the chicken. So if you can have a helper chef in the kitchen then this is a really enjoyable dish to make. Since there is division of labor, this salad is good for a date-type meal because you two can talk while cooking, without stepping on each others’ toes. This dish is slightly challenging to make, but it takes more patience and creativity than it does actual skill. So I recommend this for adventurous cooks who are adults. Young adults and kids should definitely ask their parents for help as head chefs on this one.

Before we talk about the ingredients, let’s discuss how many people this serves and what kind of cookware you will need. Since the Teriyaki Sesame Chicken Salad we made Sunday was for a large Pot-Luck party. We made enough to serve about 10-15  smallish/medium sized portions. To do that we needed several things:

1 x small saucepan: for making the glaze

1 x large metal pot: for boiling the chicken (This may seem odd but we will talk more about this later.)

1 x casserole dish or similarly sized item: for containing the chicken while you cut it into pieces before you start to glaze it (The dish will help make sure you don’t get water all over the place)

1 x large metal wok-style curved pan: for glazing the chicken

1 x large bowl for holding the cooked chicken

2 x cutting areas: for the lettuce and other vegetables

1 x large salad bowl: for the finished salad

PLUS: Forks and knives and spoons required for preparing and serving the salad. Also you’ll need a sink and a stove.

Next let’s discuss the ingredients for the salad. We purchased our ingredients at Bristol Farms here in Corona del Mar and the price for all the items was about $50 or so. But remember, in all likelyhood you aren’t going to serve as many people as we did so you can factor that into the price.

[remember to wash and dry all your vegetables]

2 x lettuce: crunchy Romain: Chopped into small edible pieces

1 x bunch of carrots: Peeled and shaved

1 x cucumber: Peeled and sliced into quarter inches

1 x red heirloom tomato: Ripe yet slightly firm

1 x yellow or gold heirloom tomato: again ripe yet slightly firm (the color variation is to add visual stimulation)

6 x boneless and skinless small chicken breasts (NOT FROZEN): These should weigh about 2 lbs. in total. If it is more or less than that, you need to adjust your poultry order accordingly

1 x jar of thick teriyaki marinade or sauce [The amount of each jar will depend on how sweet or flavorful you desire your chicken to be]

1 x jar of oily sesame marinade or sauce

1 x jar of oil based or vinaigrette sesame salad dressing

2 x handfulls of brown sugar

1 x small cupfull or packet of soy sauce

3 x pinches of salt

10 x pinches of pepper

1 x olive oil: You will use this for multiple purposes

1 x small bag of sesame seeds (white): this should not cost more than 3 dollars

OK. Since the best way to make this dish is with two people. I am going to tell you exactly how we did it. But if you are making it alone, you can always slice, shave, and chop the ingredients for the salad first. Then before mixing the salad, you can go ahead and work on the chicken.

Here’s how we did it:

My girlfriend washed and dried the vegetables. Then she chopped up the lettuce and peeled the carrots as mentioned above in the ingredients list.

In the meantime I started to boil some water in the large pot. This was going to be used for the chicken breasts. The reason why we boil the chicken first is because it makes it more tender. I learned this from listening to a pro talk about making tender BBQ ribs.

While the water is heating to boiling point. I put olive oil in the small saucepan and set the burner on high. After the oil got hot I added a generous amount of teriyaki marinade/sauce. After the marinade and oil moved around with the heat, I added a small glug of sesame marinade. (you should be stirring occasionally this whole time) Then I let that come to an almost boil and then I added a couple handfulls of brown sugar. The brown sugar is what is going to turn this from a marinade into a glaze. With the glaze we are making a reduction so be prepared to spend a lot of time on this. Now add a little salt into the saucepan and stir for a bit then lower the heat to minimal.

At this time your water in the big pot should be boiling and it is time to add the already washed chicken breasts. After all the breasts are in the pot, let the water to come again to a boil. Once the water has bubbles and you know it is boiling then start your timer for about 4 minutes. The flesh of the chicken should change to a pinkish-white color. After the four minutes are up turn off the water heat and remove the chicken carefully and place the breasts into the casserole dish. Make sure that you shake off the water from each breast or else use a serrated spoon to scoop the chicken. A little water in the casserole dish is OK but too much will be revolting and disturbing while you do your work.

Next, take a long fork and a long knife and cut the chicken into bite sized pieces. The chicken at this time should be extremely tender and easy to cut. If you keep one hand steady with the fork and cut with the knife, making simple bite sized pieces should be simple. If the chicken is not tender then you probably started with frozen chicken and didn’t read the ingredients section intently enough. Now here is the fun part. When you cut your first couple pieces of chicken you will notice that the outside of the slice will be whitish pink. And the inside of the slice will be a darker color. The color differential should resemble searing. This means that you did your job well and you should talk to your companion that is working on the salad and show him/her how skillful you are.

After you cut the pieces of chicken it is time to take another look at your glaze/thick marinade. Turn up the heat on your small saucepan to a little more than medium. Wait until the sauce starts to move around and undulate and then add more teriyaki and salt. After a couple minutes add a few pinches of pepper. Then add the pack of soy sauce. Wait until the glaze turns into a liquidy saucy abomination that isn’t too sticky yet. And once you have a good amount of the stuff add some sesame seeds into it. Then after a couple minutes take a look at the amount of sauce and the consistency of it. At this point it should be relatively thick but not too thick. We want to reduce it later. (Reduction is just a sassy term for removing the water from something by boiling it for a while) Once you feel that you have enough sauce to saucify your chicken then get ready to move onto the next step.

Now add some olive oil to the wok pan and make sure to line the whole interior of it with olive oil. This will help prevent the items from sticking to the pan. Turn the heat on high for the wok and let the olive oil heat up. (be super careful not to burn yourself or splash hot oil in your face or eyes. Do all this stuff at your own risk and have fun be don’t get your butt kicked)

Once the olive oil is really hot pour all the sauce that you made in the saucepan into the wok. Then stir the wok gently on high heat. Wait for it all to come to a light boil. While waiting you should put the big pot of water and the empty used saucepan away in the sink and dump the water out.

Now that the wok is at a near boil, take a look at the liquid levels. The wok should be about one-third to half full of sauce. (this really depends on the size of your wok) If you have more than that much liquid you need to reduce the liquid until it comes to acceptable levels. Also you should make sure that the glaze/sauce is slightly thick with a little bit of gumption to it. It shouldn’t be molasses thick at this point tho. If it is, then that means you added too much brown sugar and you will end up caramelizing your chicken and that is for a different recipe in the future. But if you end up having this problem simply pour some of your sauce out and add more olive oil and sesame marinade until you get to a semi-thick liquid.

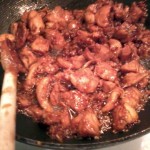
teriyaki sesame chicken in glazing process

Teriyaki Sesame Chicken in glazing process

Once the sauce comes to a good level and appropriate thickness go ahead and add the chicken slices/pieces into the wok. The trick is to put the pieces of chicken in the wok on a single layer so that each piece is about halfway submerged in the liquid. If the entire piece is covered by the liquid then you have too much sauce and you need to get rid of some of it. Now there is an urge to immediately start stirring your chicken. Don’t do that! Let the chicken take a bubble bath in your glaze for a few minutes. If you added enough olive oil and followed directions earlier you shouldn’t have to worry about the chicken sticking to the wok. While you are letting your chicken hang out in the glazy sauce for a few minutes you should double check on your comrade and see how he/she is doing with the salad.

You might be able to lend a hand with cutting the cucumber or shredding some carrots. Or else you can clean some of the dishes and free up some space in the sink. This would probably be a good time to clean that casserole dish that you used to hold the chicken pieces a few minutes ago. After a few minutes have passed take another look at your chicken.

At this time you should stir the chicken around so the other side gets cooked. You should notice that the chicken is starting to look a little golden on the side that was previously submerged. Instead of tasting anything at this point, go ahead and smell the sauce and the chicken. Does it smell appetizing? Is it too sweet smelling or too salty smelling? If so make minor adjustments by adding a little bit of the teriyaki or sesame marinade until you feel confident that this thing is going to taste great. After a few more minutes at medium-high heat, you should start to see that the sauce is getting thicker and reducing. Also some of the pieces of chicken may be fraying slightly, like pieces of rope on a sailboat. If this is happening, that is a really good sign. Because later those frayed pieces will become partially caramelized and will add a tremendous amount of texture to the dish. The good news is: If you are mindful of the temperatures and make minor adjustments at this point and beyond, it is very hard to mess this salad up.

At this moment you should have been cooking the chicken for about 20 minutes. You can now take a couple small pieces of the chicken and put them on a small plate and let them cool. After letting them hang out for 6 minutes or so let your partner and yourself eat them. Gauge the flavor and sweetness of the chicken. Is it sweet enough? Can you taste the teriyaki or does it just taste like brown sugar? If you and your buddy both like the chicken then you are doing well. Technically, the chicken should taste good enough that you could be able to eat it over rice, even now. But remember, you are putting it in a salad. So it will need to be much more flavorful and textured in order to add contrast to the lettuce and salad dressing.

Lower the heat to medium and add pepper and salt to the chicken. Also add more teriyaki or sesame marinade to taste. (this is where your artistry will really show) Then let the chicken cook for another 20 minutes, while you stir it occasionally.

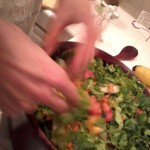
salad without the chicken yet

salad without the chicken yet

At this point your partner should be pretty much done with the salad. It should have carrots and lettuce and cucumber and tomato all chopped up and ready to go. Go ahead and mix them all together in the big salad bowl but do not add the dressing yet.

Now take another 2 pieces of the chicken out of the wok and after letting them cool down let your friend and yourself test them. If you both feel really strongly about the chicken then you can move on to the final stages.

Look at the sauce in the wok. There should be some separation from the dark liquid from a more clear liquid. That clear liquid is most likely oil and some water. If this is the case, then turn up the heat to high and stir in a generous amount of sesame seeds. The sesame seeds should speckle the chicken but not shroud them in it. Continue cooking the chicken until the frayed parts become dark brown and the chicken main parts become golden brown. If you see loose frayed pieces then stir them together with bigger pieces and let them attach themselves. Let the chicken be little poultry magnets of justice. Once you have the right color, taste, and texture remove the chicken and put it into your other clean large empty bowl. Let the chicken cool down.

Now that your salad is all mixed together, add some of the sesame vinaigrette salad dressing. Stir the whole thing. And make sure there is enough room to eventually add the chicken. Taste the salad with the dressing. It should taste like the salad is pretty good, but it is missing something.

Add the chicken that has been cooling down to the salad. And stir the chicken into the mix thoroughly. Once the chicken has been mixed in add a little more salad dressing to taste. And give it a try. If it tastes good then you have just one final step.

Wipe the edges of the bowl with a paper towel so there is no grease or oil at the rim. Then add a thin layer of sesame seeds to the top of the salad for decoration but don’t mix them in. GREAT! You just made a really tasty salad. Serve it however you want and enjoy!

Make sure you cleaned up and turned off all your burners and that stuff.

This style of cooking is incremental, so there are no real proportional rules. Just use your personal preferences and adhere to the rough measurements above as closely as you feel comfortable with and you should have a truly enjoyable time making this crowd pleasing Teriyaki Sesame Chicken Salad. Sunday this salad went over so well that we won 3rd place in a pot-luck contest with it. And we won some movie tickets. So if this is done right you may impress your friends.

-Tyler

September 7, 2010

The Fine Mesh Grill Pan is great for cooking Swordfish

Filed under: Cooking,Reviews — Tyler @ 1:36 am
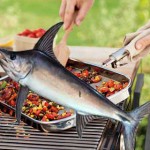
Mesh Grill Pan

Mesh Grill Pan from Williams-Sonoma

The Fine Mesh Grill Pan from Williams-Sonoma is an excellent grill accessory for anyone who grills Swordfish. If you have ever cooked swordfish on the grill before then you know that it can get flaky on the grill and can sometimes crumple and get overcooked on the thick grill bars. Well the Fine Mesh Grill Pan does a great job of distributing the grill energy all around the fish so you can a thoroughly  yet not-overcooked piece of fish. One thing that I noticed with the pan is that it got very ugly and burnt after the first few uses. This is OK. You can clean it to get most of the chunks of the pan and so it is safe to re-use. But this is not supposed to be your most glamorous piece of kitchenware. It ain’t supposed to look pretty. It is just there to do its job. And it DOES do an excellent job of producing scrumptious pieces of Swordfish, and other fish as well. My main trick to cooking swordfish on the Fine Mesh Grill Pan is to season the fish first.

How I season the fish is I first add some good quality olive oil to both sides of the swordfish. Make sure that your hands have been washed and you are safe to touch and prepare food.  Then I choose the side that I want to season. Usually I pick the side that isn’t as visually appealing. I add some sea salt and rub it in nice and easy. You don’t need to much to do the trick so don’t overdo it. Next I smother some paprika on the side that I decided to season. You shouldn’t add too much, just use enough to give the fish a nice, mildly reddish tint. Then I add some cracked pepper for some kick and texture. After that I put some ground savory seasoning on it. It should add a greenish-black color to the fish. This flavor is excellent once you grill it up. Another thing to add is ground oregano bits. This is mostly for macro texture and it isn’t really for the flavor. Besides most of the oregano will get burnt anyway. But the cool thing is that it will help create the crispiness and the tiny bit of crunch that will make your swordfish scream with delectability.

Here’s the trick: When you are ready to grill the swordfish or other fish of your choice, MAKE SURE that your grill is nice and HOT first. You don’t want to have a variable temperature when grilling your fish. AND ANOTHER THING: Grill your fish on the Seasoned Side first! This may be counter intuitive, but if you don’t disturb your fish and let it cook for a few minutes or so depending on how thick your piece of fish is, you will yield good results. How long you cook your fish is up to you, but remember these things have all sorts of bacteria and critters living inside them so you might as well stay on the safe side and cook your fish thoroughly.

The best way I’ve found to grill swordfish is to only flip the fish once. That means that you need to look closely at your piece of fish and see if it has grilled 60% or so as far as you want to go. Then when you flip it you should only need to cook it for about 30-40% more time. If you flip your fish too much you will break it apart and it will be more spongy and less visually appealing. It may taste more rubbery if you flip it too much also.

One thing that you’ll need with your Fine Mesh Grill Pan is a long, sturdy spatula. This way you will be able to quickly dislodge and flip the fish. There is a good chance that the fish will resist you from scraping it off the grill pan at first. Be persistent and use quick yet strong thrusts in order to avoid damaging the fish and to preserve as much of the crispiness and integrity of the crust as possible.

A cool feature to the Fine Mesh Grill Pan is that Williams-Sonoma includes a detachable handle that is very sturdy. You take the handle off when you aren’t placing or removing the pan on the grill. That way, when you want to remove the grill pan from the grill you won’t have to worry about burning yourself. The quality of metal is very nice stainless steel. And the Fine Mesh Grill Pan costs about $30.00 and I think it is well worth the price due to how you can improve the finished quality of expensive fish. Let’s face it, it can easily cost more than $30 – $50 for some good quality swordfish depending on how many people are eating. So if you are going to spend that kind of money on lunch or dinner, you might as well drop the extra cash to have a high-quality accessory that can assist in cooking it with perfection.

You can use the Fine Mesh Grill Pan for things other than fish. My family and I have used it for vegetables and other edible items. But I think it really shines on grilling up swordfish.

-Tyler

« Newer PostsOlder Posts »

Powered by WordPress